搜索到
43
篇与
的结果
-

-
微信小程序学习 1、到处小程序包导出wxapkg包有两种方式,一个PC端,一个是Android端它们的目录分别在:PC端:文件在微信缓存 \WeChat Files\Applet 目录下,默认在 C:\Users{{user_name}}\Documents\WeChat Files\Applet,user_name为电脑用户名Android端:文件放在 data/data/com.tencent.mm/MicroMsg 目录下,不过此方式需要root权限。2、解析wxapkg包:提一下,小程序本身为了承载更多功能存在分包机制,所以wxapkg中分为主包,分包,运行基础库三种,可以从简单的包大小判断它是什么包,一般主包大小在2-4m之间,有时候也会出现4m+的情况。分包大小类似,但不会大于主包,运行基础库则比主包大,一般在7m左右,但有些情况也超过7m,达到几十兆。而我们需要解析的包,解析主包与分包就行。这里,我们需要用到的解析库有,https://github.com/kksanyu/pc_wxapkg_decrypt_pythonhttps://github.com/smartchart/wxapkghttps://github.com/xuedingmiaojun/wxappUnpackerpc_wxapkg_decrypt_python:用于解码pc端小程序包,即解析成源生态的手机端wxapkgsmartchart/wxapkg:解析wxapkg包。wxappUnpacker:同样是用来解析wxapkg包,只不过它还原了项目的本身。更容易我们去分析与调试。pc_wxapkg_decrypt_python:用于解码pc端小程序包,即解析成源生态的手机端wxapkgsmartchart/wxapkg:解析wxapkg包。wxappUnpacker:同样是用来解析wxapkg包,只不过它还原了项目的本身。更容易我们去分析与调试。wxappUnpacker 解包解析主包解析子包
-
python 查看消息防撤回 记录一份牛逼的代码,用于记录别人撤回的消息下面是代码:# This is a sample Python script. # Press Shift+F10 to execute it or replace it with your code. # Press Double Shift to search everywhere for classes, files, tool windows, actions, and settings. import itchat from itchat.content import * import os import time import xml.dom.minidom # 解析xml模块 def print_hi(name): # Use a breakpoint in the code line below to debug your script. print(f'Hi, {name}') # Press Ctrl+F8 to toggle the breakpoint. # Press the green button in the gutter to run the script. if __name__ == '__main__': print_hi('PyCharm') # 这是保存撤回消息的文件目录(如:图片、语音等),这里已经写死了,大家可以自行修改 temp = 'D:/files/tmp/electron' + '/' + '消息' if not os.path.exists(temp): os.mkdir(temp) itchat.auto_login(True) # 自动登录 dict = {} # 定义一个字典 # 这是一个装饰器,给下面的函数添加新功能 # 能够捕获好友发送的消息,并传递给函数参数msg @itchat.msg_register([TEXT, PICTURE, FRIENDS, CARD, MAP, SHARING, RECORDING, ATTACHMENT, VIDEO]) # 文本,语音,图片 def resever_info(msg): global dict # 声明全局变量 info = msg['Text'] # 取出消息内容 msgId = msg['MsgId'] # 取出消息标识 info_type = msg['Type'] # 取出消息类型 name = msg['FileName'] # 取出消息文件名 # 取出消息发送者标识并从好友列表中检索 fromUser = itchat.search_friends(userName=msg['FromUserName'])['NickName'] ticks = msg['CreateTime'] # 获取信息发送的时间 time_local = time.localtime(ticks) dt = time.strftime("%Y-%m-%d %H:%M:%S", time_local) # 格式化日期 # 将消息标识和消息内容添加到字典 # 每一条消息的唯一标识作为键,消息的具体信息作为值,也是一个字典 dict[msgId] = {"info": info, "info_type": info_type, "name": name, "fromUser": fromUser, "dt": dt} @itchat.msg_register(NOTE) # 监听系统提示 def note_info(msg): # 监听到好友撤回了一条消息 if '撤回了一条消息' in msg['Text']: # 获取系统消息中的Content结点值 content = msg['Content'] # Content值为xml,解析xml doc = xml.dom.minidom.parseString(content) # 取出msgid标签的值 result = doc.getElementsByTagName("msgid") # 该msgId就是撤回的消息标识,通过它可以在字典中找到撤回的消息信息 msgId = result[0].childNodes[0].nodeValue # 从字典中取出对应消息标识的消息类型 msg_type = dict[msgId]['info_type'] if msg_type == 'Recording': # 撤回的消息为语音 recording_info = dict[msgId]['info'] # 取出消息标识对应的消息内容 info_name = dict[msgId]['name'] # 取出消息文件名 fromUser = dict[msgId]['fromUser'] # 取出发送者 dt = dict[msgId]['dt'] # 取出发送时间 recording_info(temp + '/' + info_name) # 保存语音 # 拼接提示消息 send_msg = '【发送人:】' + fromUser + '\n' + '发送时间:' + dt + '\n' + '撤回了一条语音' itchat.send(send_msg, 'filehelper') # 将提示消息发送给文件助手 # 发送保存的语音 itchat.send_file(temp + '/' + info_name, 'filehelper') del dict[msgId] # 删除字典中对应的消息 print("保存语音") elif msg_type == 'Text': text_info = dict[msgId]['info'] # 取出消息标识对应的消息内容 fromUser = dict[msgId]['fromUser'] # 取出发送者 dt = dict[msgId]['dt'] # 取出发送时间 # 拼接提示消息 send_msg = '【发送人:】' + fromUser + '\n' + '发送时间:' + dt + '\n' + '撤回内容:' + text_info # 将提示消息发送给文件助手 itchat.send(send_msg, 'filehelper') del dict[msgId] # 删除字典中对应的消息 print("保存文本") elif msg_type == 'Picture': picture_info = dict[msgId]['info'] # 取出消息标识对应的消息内容 fromUser = dict[msgId]['fromUser'] # 取出发送者 dt = dict[msgId]['dt'] # 取出发送时间 info_name = dict[msgId]['name'] # 取出文件名 picture_info(temp + '/' + info_name) # 保存图片 # 拼接提示消息 send_msg = '【发送人:】' + fromUser + '\n' + '发送时间:' + dt + '\n' + '撤回了一张图片' itchat.send(send_msg, 'filehelper') # 将图片发送给文件助手 # 发送保存的语音 itchat.send_file(temp + '/' + info_name, 'filehelper') del dict[msgId] # 删除字典中对应的消息 print("保存图片") itchat.run()
-
-
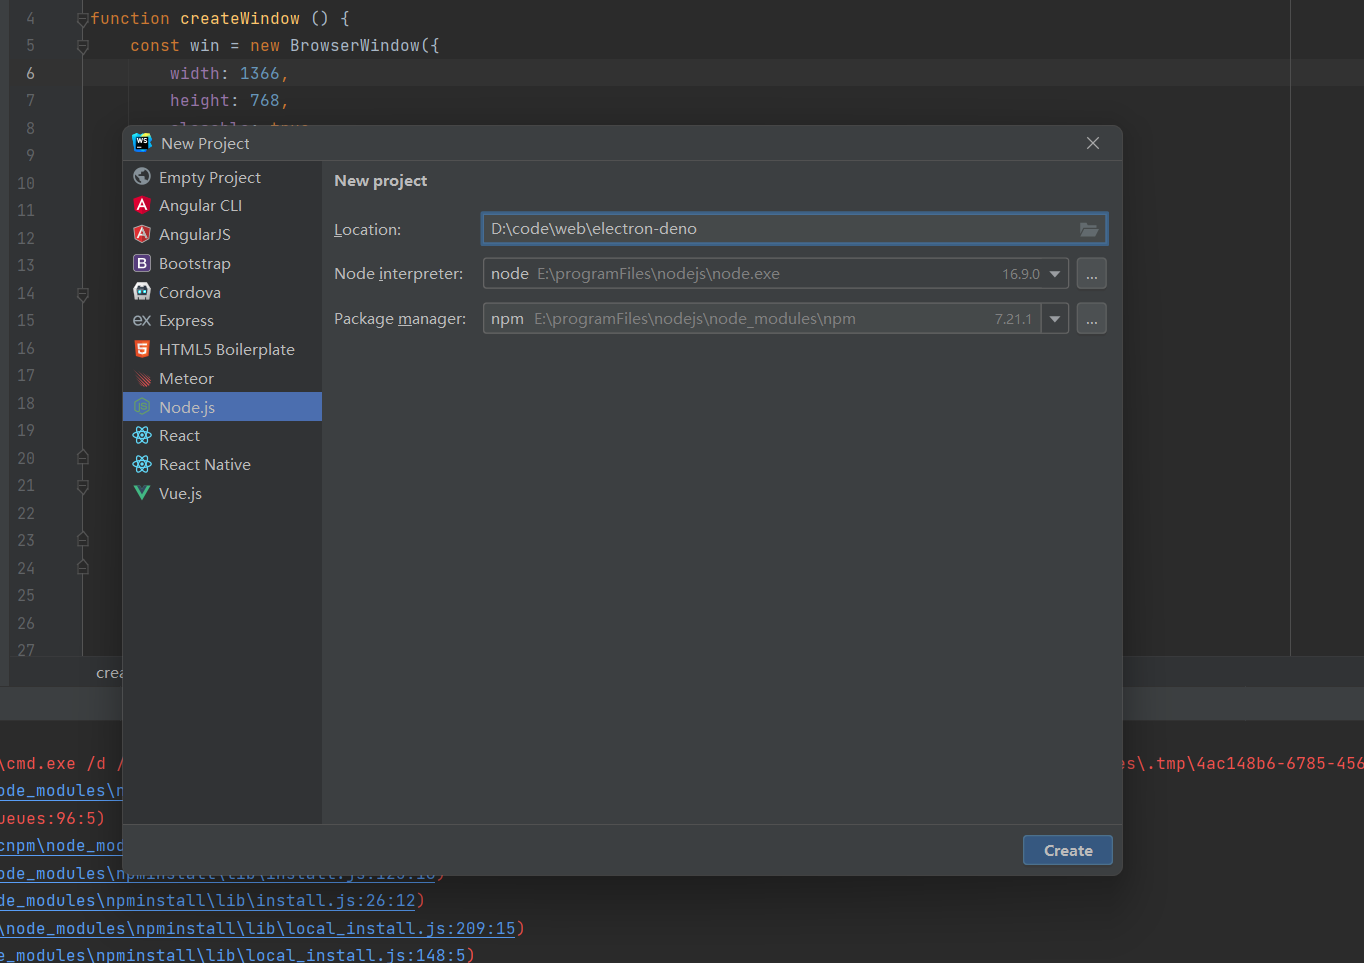
webStrom 通过electron创建第一个桌面程序 1、首先要安装好node环境,并配置cmpn(如果不用cnpm好多包下不下来)2、打开 cmd,运行 npm -v 和node -v 检查nodejs 是否安装成功3、打开 websotom ,新建nodejs项目4、打开webstorm下方的terminal,输入npm init 初始化项目5、新建main.js 和 index.html文件6、查看package.json 文件,修改其中的main,和scripts的值,修改为"main": "main.js", "scripts": { "start": "electron ." },7、安装electron 依赖cnpm install --save-dev electron8、按官网实例复制index.html和main.js文件内容到项目中index.html<!DOCTYPE html> <html> <head> <meta charset="UTF-8"> <title>Hello World!</title> <meta http-equiv="Content-Security-Policy" content="script-src 'self' 'unsafe-inline';" /> </head> <body> <h1>Hello World!</h1> <p> We are using Node.js <span id="node-version"></span>, Chromium <span id="chrome-version"></span>, and Electron <span id="electron-version"></span>. </p> </body> </html> main.jsconst { app, BrowserWindow } = require('electron') const path = require('path') function createWindow () { const win = new BrowserWindow({ width: 800, height: 600, webPreferences: { preload: path.join(__dirname, 'preload.js') } }) win.loadFile('index.html') } app.whenReady().then(() => { createWindow() app.on('activate', () => { if (BrowserWindow.getAllWindows().length === 0) { createWindow() } }) }) app.on('window-all-closed', () => { if (process.platform !== 'darwin') { app.quit() } })9、运行项目npm start 10、个人比较喜欢webstorm 右上方的直接启动方式,点击 edit-configurations, +号,选择npm ,然后在左侧的script输入 start然后确定,退出来可以直接点击右上角的三角形运行了